Add a Scheduled Report
To create a Scheduled Report, select Reports > Scheduled Reports > Add. Enter the required fields on the Add Scheduled Report screen displayed. Once the appropriate fields have been entered, click Save. The Scheduled Reports List will appear with the message Report successfully scheduled upon completion.
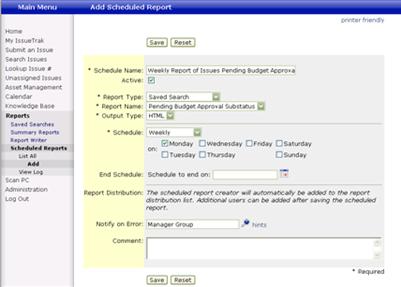
NOTE: The Report Distribution List can only be added or maintained after a Scheduled Report has been added. If a user or group has been defined in the Notify on Error field in the Add Scheduled Report screen, this user or group will be a member of the Report Distribution by default.